

The Rock Gospel
Rocking is our business, and business is good
Thank you for confiding in me.
Teaching has been great. I love the opportunity to connect with ya'll through music and drums. I've been wanting to make this website for a while because some people are hesitant to sign up for a lesson without knowing where to start, and lately it's been harder to respond to messages online. This can give some of ya'll something to reference before scheduling with me. I also have been wanting to give more insight, demonstrations, and rundown to everyone that has ever gotten a lesson from me before. Thank you! It's hard to give the proper acknowledgement for everything important in 1-2 hours.
I will treat this as blog where I discuss all kinds of topics related to drumming. As time passes, I will keep adding on here. Please feel free to reach out anytime about anything. If you have a question the chances are high that I will be more than happy to talk about it and maybe even post about it on here. If not through text message, then reach out to dr.marioofrock@gmail.com
There will be exceptions to rules!
Happy practicing!
-Mario
Learn to use your fingers!


Like Chubb's told Happy Gilmore that golfing is "all in the hips" Sir Mario is telling you that drumming is all in the fingers.
Well... not ALL in the fingers, but it is the foundation. It is your first point of contact with the stick.
The less fingers you use, the less contact you have with the stick. The less contact you have with the stick then the less you’re choking the sound. Depending on what you need to play, decide how much power you need. More fingers equal more power. Think of it like switching gears while driving a manual transmission.
1st gear- Index
2nd gear- Index and middle
3rd gear- index, middle, and ring
4th gear- index, middle, ring, and pinky
During all of these, your thumb is always pressing on the stick. If you need more power than all of the fingers then use wrist, and if that isn't enough then use your whole arm. Whatever it takes to portray the energy you need to give.
The more strength and balance/control you develop with your fingers and the stick, the more you can afford to play with a relaxed hand that will produce a more pleasant sound. You want to avoid tensing up on the stick because you will strain yourself and produce a harsher sound than necessary. Even when you are having to play with more than just your fingers, you are still incorporating them, and if they are clenching/gripping too hard then it will affect your sound even if you are using your whole arm. It pays to learn how to use your fingers.
The moment I knew for myself that I accomplished getting decent technique through my fingers was when I rocked a small room with a strong sound that felt loud and filled up the room, to then afterwards have people in the audience tell me that they we’re able to enjoy the performance without earplugs and without feeling like their ears took a beating. This is mainly accomplished by having good finger technique. You don't want to play so harshly that you drive people away because of how the sound hurts their ears. I've seen it happen so many times. We need to control ourselves according to the room. There are times and places for harsh sounds, but even when playing rock music, I find that I make the experience better for everyone when I keep the sound strong and loud without being harsh.
Practice switching between different gears. Start slow. Try not to move your arm or wrist. Being clumsy at this is normal at first. You’ll lose balance, slide around the stick, and bounce around uncontrollably. Just keep adjusting and starting over.
If you’re like me then this exercise will be boring and hard to patiently do for a while. I thought this exercise was a waste of time when I first discovered but came around years later and realized how important it was. Doing this exercise while you're passing the time is easy once you get comfortable enough with it.
I'll be more than happy to walk you through this exercise during a lesson if haven't had one yet. This is one of the fundamental exercises for gaining good technique
The different kinds of strokes
You gotta know them
Full stroke- When you hit the drum and bring the stick back to wherever you started. Full stroke
Tap stroke- When you tap the drum and then keep the stick in a resting position close to the drum head. Tap stroke
Down stroke- When you hit the drum from a sarting position to then keep the stick down closer to the drum head. Down stroke
Up stroke- When you lift the drum stick to a higher position after tapping the drum. Up stroke
Buzz stroke- Buzz stroke
The greatest exercise for gaining control...
Get comfortable switching between extremities to gain great control. Loud and quiet. Hard and soft.
When people ask me how I have so much control with my hands, I credit most of it to this exercise that I’m about to share.
You simply alternate between down strokes and up strokes!
As simple as it sounds, the true effectiveness of this exercise can only be achieved if you really strive to make the down strokes as strong as you can while controlling the stick to set you up to make the up stroke as quiet as possible.
You’re developing strength and twitch muscles in your hands with this exercise. As with anything else, start slow if you’re finding yourself struggling to get a night and day difference between the two extremities. Make them both sound so incredibly different. Reach for both ends of the spectrum. When you get comfortable switching between the two you will demonstrate true control. This is an easy exercise to practice along to music. This exercise is a great tool that we can easily use to gain the ability to shape the dynamic of the music as drummers. If the gap between how loud and quiet, you can play this exercise is not very wide then you know that you need to slow down in order to give yourself more time to practice widening the gap.
Alternating between HARD down strokes and SOFT upstrokes


Rimshots/bass drum beater angle
You gotta give the music that extra edge to make the experience more memorable
Especially if the instruments are amplified and you’re playing in a band that wants to play LOUD and STRONG in order to leave an impact. I can’t tell you the number of times I’ve seen a band that sounds great, but is falling short of their potential because the drummer is not cutting through sonically compared to the rest of the band. Brute force helps, but playing strong is more of a matter of being in tune with the physics of hitting rim shots, bass drum, and cymbals right.
THE SNARE
-
Needs to have solid rim shots on the back beats or whatever the pulse is. A more timid drummer that hasn’t taken the time to figure this out is usually playing directly on the drum head. This simply won’t cut through if you're playing in a loud band.
-
If you are gonna play rim shots, practice them so that you can do it with ease without sounding harsh. I can’t tell you how many times I’ve also seen drummers that force their rimshots too much to the point where they sound harsh and unpleasant. You don’t have to bury your stick into the drum; it chokes the sound. Practice rim shots.
Here’s some examples of rim shots vs playing directly on the head. Even if you are playing loud on the head, you are still missing that extra edge.
Playing directly on the head vs playing rim shots
Here’s an example of me playing them with a loud band. I would not be cutting through to the audience without them. From the audience perspective they are getting more instruments (Guitars) their way.
THE BASS DRUM
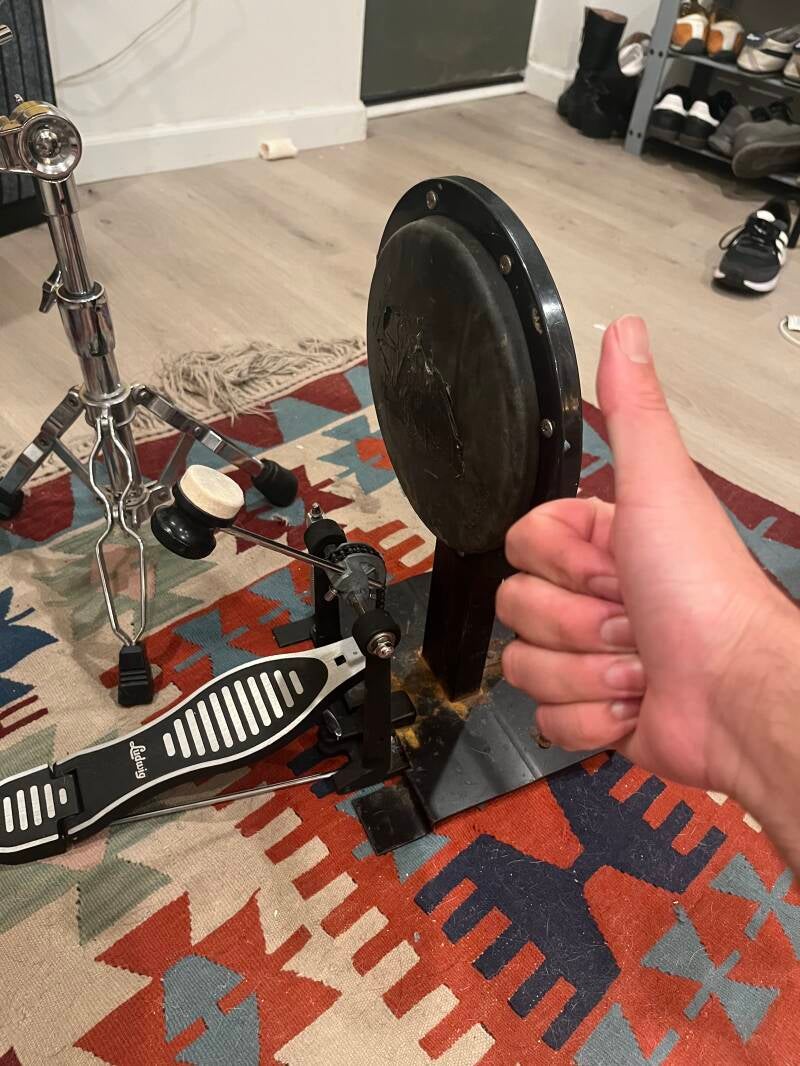
So many times, I’ve witnessed drummers having trouble cutting through because they have their beater set up too close to the drum. Give yourself headroom and set the beater up farther back. It might make you feel like you’re losing speed, but if you get used to the way it feels you can easily get that speed back. Once you try it, you’ll notice how much easier it is to control the timing of hitting the bass drum with the beater when it’s pulled back. A lot of people set the beater up closer to the head because they think it helps with speed, but most of the time they don't realize how much harder it is to control the beater when it's set up that way, too close to the head. It's much harder to control to the point where it can make you clumsy, and more prone to burying the beater into the head which chokes the sound of the bass drum.
You’re giving yourself head room to play louder and cut through loud amps when you pull the beater back. If you pull back too much you will hit your shin when trying to play loud. This will hurt and be a sign that you need to get better at controlling the pedal or setting it up a little closer to the head.
When you practice feathering the bass drum you engage your twitch muscles in your leg and figure out how to use them to control the pedal to play softer, even if it is pulled way back. This is another obstacle we overcome in order to have dynamic control on the kick drum. I will share a blog about feathering the bass drum soon.

Articulation/Fluidity
We want to get our message across, so we practice how we articulate.
Here are two key steps to building exercises that will make you an articulate drummer. This is my logical approach to teaching myself.
-
Take ANY two rudiments and play them back-to-back against each other along to a metronome to hold you accountable to consistency. When you become consistent at keeping the spacing between notes even, while alternating between the two rudiments, you are demonstrating articulation and fluency in the phrases you are putting together. If you find yourself playing one rudiment cleaner and more consistent than the other then you know which rudiment you need to spend more time on, the one you are playing sloppier.
Here’s a basic and very practical example. I look at a list of rudiments and I pick ANY two. In this case I decide to pick the “single stroke roll”, and the “double stroke roll” (Let's start with the two most basic and practical rudiments). So, I switch back and forth between both of those rudiments while aiming for consistent spacing and fluidity
Single stroke/ Double stroke roll
-
Take what you got from the previous exercise you've created and play it on top of ANY ostinato you decide to play with your feet. In this random example I'll choose to play a samba pattern on the feet. The feet hold your hands accountable and visa versa. When things don’t align it becomes much more obvious how you need to articulate everything in order to get it all to line up. Slow it down until you figure out the coordination.
Here’s me doing that same example from the previous exercise over a samba pattern on the feet.
Single stroke/double stroke roll over a Samba pattern on the feet
The more vocabulary you can go back and forth between playing in your hands, while playing patterns with your feet will help you articulate the language of drumming more fluidly. Not only because you gain more knowledge of using vocabulary fluently, but because you are increasing your coordination skills.
You don't need to pick a complicated pattern to play with your feet. Even simply playing down beats/quarter notes with either foot while doing ANY hand exercise will ensure that you play it x10 more accurately than without any leg coordination/playing involved.
Rudiments




They're the vocabulary we use in the language of drumming
Single stroke roll- Is the most practical to use. Even playing simple single strokes can elevate a drummer that doesn’t know much vocabulary to play a performance with the flare necessary to make it great. You’re simply alternating between the left and right hand.
Double stroke roll- It’s an easy way to play fast which makes this rudiment the most fun in my opinion. It is also very practical, but requires more practice to use articulately in the context of music than a single stroke roll, especially if you’re having to play it on different surfaces/instruments. Learning to control the double to get consistent even spacing is the goal. Right, right, left, left, right, right, left, left…
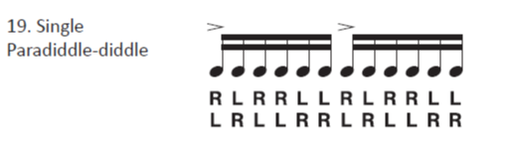
Paradiddle- is helpful for moving around. Learn all of them to have true freedom moving around.
-
Single paradiddle - Single Paradiddle
-
Double paradiddle - Double Paradiddle
-
Right hand paradiddle diddle - Right hand Paradiddle diddle
-
Left hand Paradiddle diddle - Left Hand Paradiddle diddle
Flam rudiments- All of these rudiments will broaden your sound, and give you coordination and knowledge for playing non linear drum parts.
- Flam - Flams
- Flam Tap - Flam Tap
- Inverted flam tap- Coming soon
- Flam Accent - Flam Accent
- Swiss Amy Triplet- coming soon
- Ratamacue- coming soon
Triple Stroke Roll - Triple Stroke Roll
3's - 3’s
Cheese-coming soon
Flam drag- Learn "Flam accent" first. Coming soon.
Have a good attitude and have fun
We have it good, and it can only get better from here if we practice a little every day.
The art of articulating rhythm becomes more fun the more we learn how to do it. This is a big reason we look forward to playing every day! Don't be afraid to learn. Gaining coordination through learning how to articulate rhythm is very healthy for us. In gaining chops/facility you can afford to convey more energy in your message. Keep figuring it out.
Find fun ways to practice/ Push yourself at least once a day/ Dial in muscle memory
This will ensure progress.
A big part of becoming a fluent drummer is locking in the vocabulary we play into our muscle memory.
That's why I get most of my practice done while watching TV. It's the best. Just picking some kind of vocabulary or anything to do over and over again, while I have something showing. The show can be what's in the background of my attention, or it can be my main focus while I'm playing something in the background. Either way some work is getting done. The muscle memory is being learned.
Play on grass, floors, pillows, underwater, fun surfaces etc... It teaches you to adapt and gives your hands chances to use different muscles. Playing on soft surfaces builds a lot of strength. Playing on hard surfaces gives you a chance to learn how to control the rebound.
Push yourself to pick any rudiment and max out on playing it as loud/fast as you can for as long as you can. Keep it going until you fall apart. You will build facility this way. I will share soon more of me maxing out on different language in the next blog post!
Spend a lot of time practicing things that are practical, but when you don't have your work clearly cut out for you try not to over think what you need to practice. Even if you get good at something that may seem impractical, it isn't a waste of time because you are still gaining facility and coordination. From my experience, I've always found ways to incorporate stuff that I thought would be impractical at first, and actually, I end up finding ways to make learning "impractical" stuff a useful part of my vocabulary that makes me unique. Whatever you decide to do, don't waste time overthinking it. Pick anything simple. A split on repeat to a metronome, anything.
Sure, sometimes you'll have deadlines and setting goals to reach within a schedule is a good strategy, but if you're just focused on getting good, don't overthink it. Even if you can't find something new and practical to practice, don't worry, it'll come to you eventually, especially if you're regularly playing along to music. Keep overcoming the obstacles that come with playing along.
Rudiment max outs
On each rudiment I max out on I will explain more on the importance of mastering each one
FLAM TAP - Flam tap MAX OUT
Mastering the flam tap ensures that we can throw down 3's fluently with both hands. These rythmns are important to master because they subdivide and push the music forward. This works in most styles of music. Samba, up tempo swing, funk, fusion... etc.
Will share more examples soon!
Splits as vocabulary/chops
Here's a list of different splits you can use as vocabulary
Here are some of the more practical ones
Although this is the most basic of all the splits, it will build coordination more than any other. In my opinion this one is the most difficult. It takes practice to get the coordination necessary to play this evenly
RKRK, LKLK, RKLK, LKRL
This one is so useful for rock fills, and playing over all linear chops. This one is not hard to do once you get the hang of playing good double with your bass drum. Just make sure they're even.
Possible sticking's- RLKK, LRKK, RRKK, LLKK.
This one is very practical for fills. This one takes patience to get down.
Possible sticking's- RLK, LRK, RRK, LLK
Accent a beat with your hands while you fill in the space with your bass drum.
Sticking's- RKK, LKK, BKK
This one is very useful for shredding in a stylish way that fits most music!
Sticking's- RLRLKK, LRLRKK...... If you get confident with doubles try RRLLKK or LLRRKK
Here are more that are good to know
This one is just like the last one (3:1) except I wrote it out this way so that you can visualize the bass drum on the down beats.
Take ANY two of them and figure out how to put them together to create an exercise. Refer to the earlier article called "Articulation/Fluidity". Here's a simple example where I take 1:1 and 2:2 and play them back to back, aiming for consistency.
Proper Setup
You want to be comfortable while being able to get the most out of the instruments you're playing
You want to be able to comfortably sit up straight and get all possible dynamics. It takes discipline and effort to sit up straight. If you are constantly hunching over, you'll have to live with back pain. Having to constantly deal with that kind of pain is difficult. I know because I hunched over a lot when I played as a young adult. One thing that helped me learn how to sit up straight is doing leg presses at the gym. Squats are also good. Anything that gets you in the habit of engaging your glutes. Engage your glutes in that same way while you're drummin'!
Snare/Hi-Hat- You don't want them to be so low that you can't get a rim shot on the snare, or a good crashing motion on the hi hats, or where you're hitting your stick on your thighs.
You don't want them so high that you have to be straining constantly to reach them.
You don't want the instruments too close together height wise. If they're set up too close together then your hands are going to keep running into each other because they won't have space to move. This makes it hard to crash the hats while hitting loud/rimshots.
You also don't want the snare and hi hat to be too separate from each other height wise. If you do, then you're making it hard for yourself to move around between the two.
You want the snare set up where you can easily play rim shots and also on the head, while being able to move comfortably to the rest of the kit.
Sitting- You don't want to sit so low that it makes it difficult to sit up straight because the knees are too bent. You also don't want to sit so high that it feels difficult for your feet to reach the pedals. If you can't rest your feet comfortably on the floor, then you'll have more strain put on your back. If you slouch, then you look like a slob and cheapen the experience. Don't slouch too much.
It took me repeated sessions of practice while making the way I sit up straight the focal point of my practice to fix my posture behind the kit. Use a mirror and start with easy exercises so that you can keep your focus on maintaining posture.
SET UP, BREAK DOWN, AND GET OUT OF THE WAY QUICK
If you take too long people will resent you. It's easy to want to take your time getting out of the way after having an amazing rock experience, but the drums are taking up space where someone else will need to play soon, so we got to keep them out of the way. If you play out, you will see so many drummers don't care for time and spatial awareness. It's hard to take them seriously. Most of the time they don't realize it, but they are affecting how smoothly the rest of the night will go. Even if we are able to do it faster than most people, it takes time and work to transport and set up drums. We just gotta use our time wisely.
Your friends will tempt you to take a long time to get off stage with all of their praise, or they will tempt you to procrastinate setting up for an opportunity to hang out. Take you kudos with grace, and then respectfully let them know that you have matters to attend to. You'll have a good hang after.
Don't be afraid to use a house kit if it's not falling apart. Adapting to house kits can teach a lot and keep us sharp. Of course, with partaking in sharing equipment and spaces you'll run into many unforgettable experiences. Some that are hilarious, and some that will just drive you nuts. We could talk about this forever, but as long as you do your best to keep things going without starting conflict with other people, you are setting the example that will inspire the rest of the people involved to keep the show running.


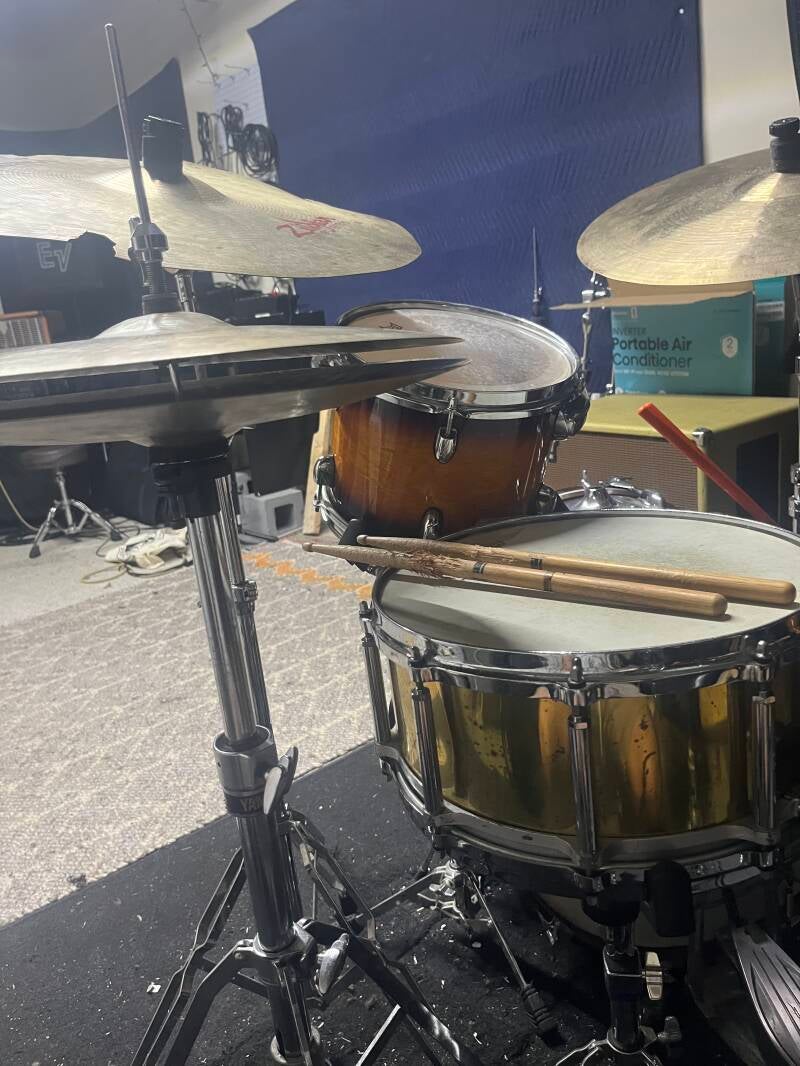
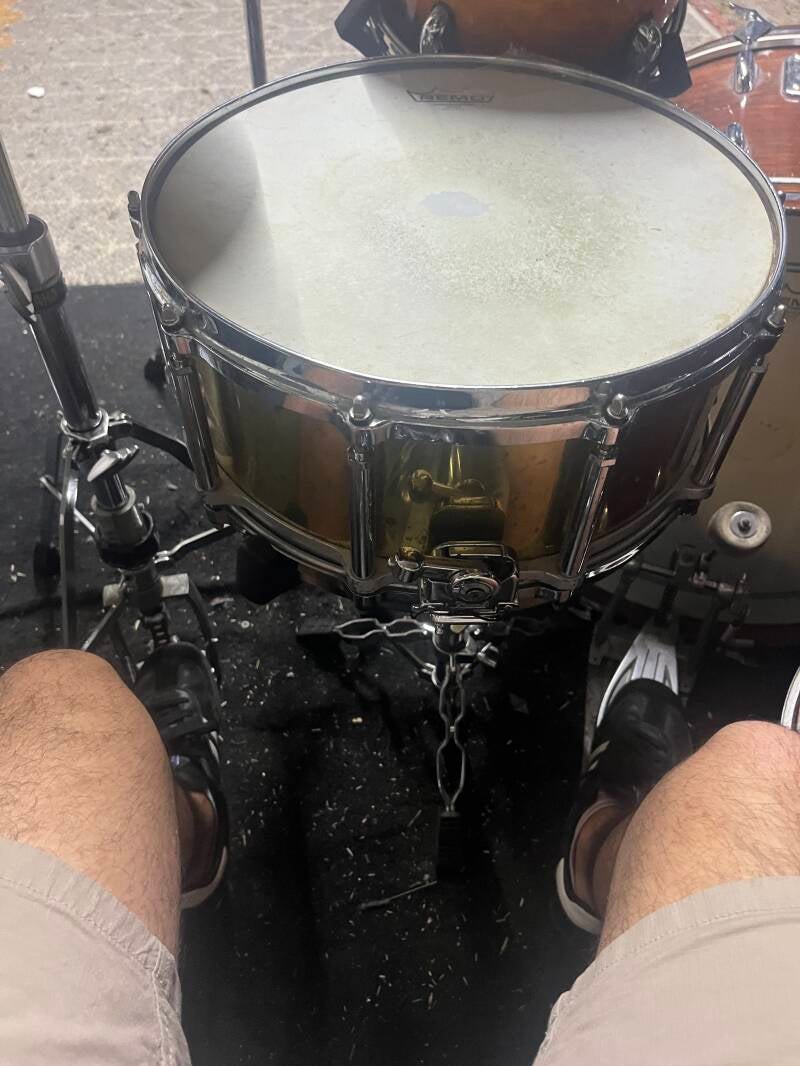
Here are all good examples of a set up where I can move between the hi hats and snare with ease and have the snare high enough where I can easily hit rim shots.
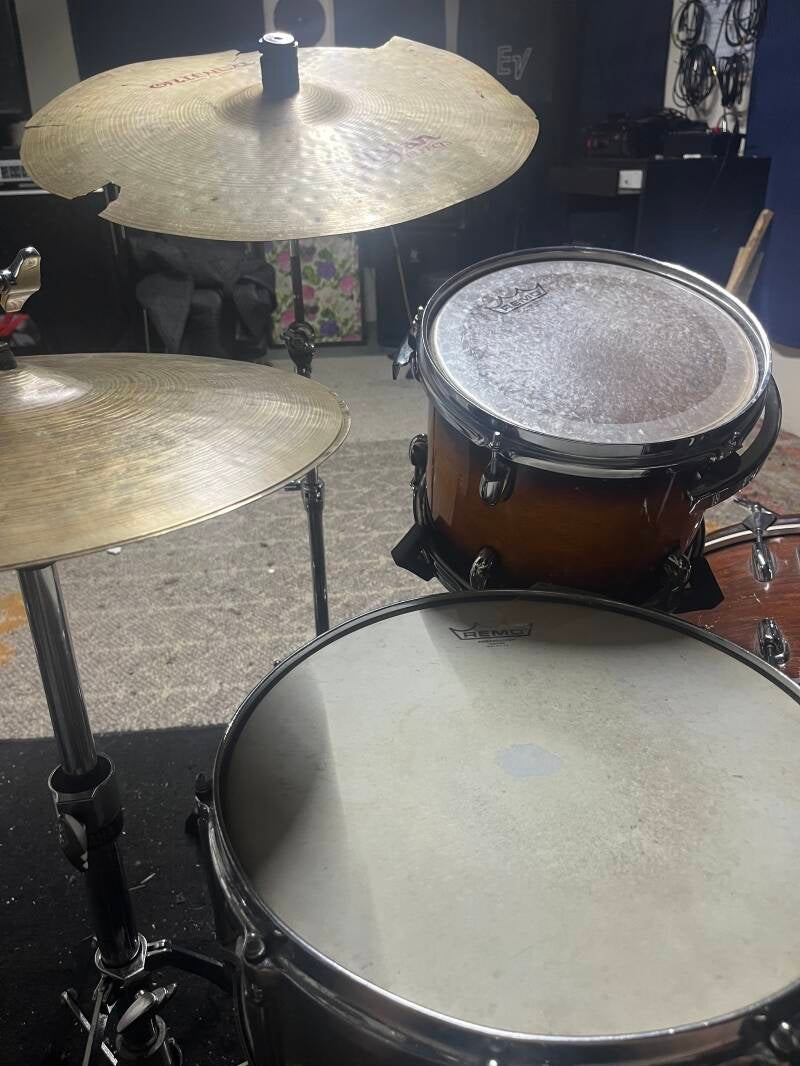
What heads/sticks to use
Depends on what your skill level is and what sound you need. It helps to set yourself up to get a good rebound that you can easily control and work with to use to your advantage.
STICKS
If you're new to drumming, then you want to start with a standard 5A drumstick because it is the most average in size. If you have bigger hands than average, then you might want to do something bigger/heavier like a 5B or 2B.
If you're playing quieter/softer music, then a smaller stick like a 7A can help you accomplish so with more ease.
Lighter/smaller sticks will help you move around with more ease.
Heavier/bigger sticks will help you get more rebound that is easier to control. They can also help you get more volume with ease, which can be very helpful if playing in a loud band.
Use VERY big sticks like marching drumsticks to get a good work out at home and build strength.
HEADS
The best choice is always a single ply drum head on the batter side like a "Remo Ambassador". Because you're only playing on a single ply you will get more rebound than a double ply head. Always use the rebound to your advantage.
Besides giving you the rebound advantage, you have more sound options with a single ply head to adjust to a room/music.
"You can take something lively and deaden it, but you can't liven up a dead sound." Is what Tommy Robinson taught me while I was working at Tommy's Drum shop.
This is why we pick the "Remo Ambassador" or an equivalent as the batter side drum head. With only a single ply you can get a lively tone with this kind of drum head. You can dampen it with moon gels, tape, your wallet, or any device that can be used to dampen the head. Every room is different. Different styles of music call for different tones. Something that is too lively in the wrong setting can sound harsh. Something that sounds too dead in the wrong setting sounds weak. Adjust accordingly...
If you know that you like to play loud with bad technique, play with some kind of double ply head for its durability. Eventually, figure out how to use your fingers so that you aren't having to play with bad technique.
Playing with a double ply head will never give you the great lively tone or the rebound of a single ply head, but it can give you a fatter and deeper tone that can sound great for certain styles of music. You can also get deep tone from a single ply head if you use a device like "big fat snare drum" for example.
I will share more on this! There are so many different gadgets. I learned so much from experience playing many styles of music, but mostly I learned while I was working at Tommy's drum shop where I had to recommend products for all kinds of drummers and fix up/tune their drums. Please feel free to ask any questions.
Thoughts on playing out socially
No matter what we're confronted with, love learning and be grateful to learn. Acquire merits and then let them speak for themself.
It's important to be professional to the extent where people know they can rely on you, but don't feel like you have to act so much so where it takes away from you having fun, or where you become too easily disturbed to go with the flow and adapt when things don't go your way, which will happen often in music endeavors. Musicians can be very unpredictable people that will often bring drama with them. Problems are inevitable, but we at least try to avoid the unnecessary ones or adapt and move on so that we can have more time to dedicate our love of learning and sharing the language of drumming.
There are so many reasons to play music with so many different people. Sometimes I like to entertain people, so I just play with them to give them the experience. Sometimes I get a chance to play with a musician who's work I admire. Maybe I get offered the right amount of money to play a gig I'm just excited enough about. Whatever the reasons are, there's always been something to learn. But after learning, I always felt more comfortable saying yes or no to those same kinds of opportunities later down the road, because I had come to understand them. The more I got to say no, the more I got to shed on my own, which is always a great thing. No matter what opportunity you're presented, be humble and just glad that you get a new opportunity to share the moving energy of playing drums. Let the music speak for itself. The rest will take care of itself.
Through being adventurous we gain experience that builds our confidence that leads us to be captains, leading our mates to new places musically. If you haven't experienced the type of opportunity that you are confronted with then it might be worth considering if it's worth doing as long as you're mindful of your time. Learn and know what red flags to look for.
If you're like me, you will be so glad that you got to spend a lot of time practicing when life hits you with things that keep you from shedding. Make good use of those times you get to shed.
Warm up before every performance. Warming up will ensure that we effortlessly play better during the show.
Don't be afraid to speak up about levels! If everyone is so loud in your monitors then you will feel drowned out, and struggle to cut through. If everything is too quiet, then it can be hard to get in the zone.
After you set up all the gear, and before you play your set, take a moment to play the thing you're best at. Belt it out!! This will grab people's attention so that they can consider tuning in to the experience you're about to provide. For me personally it's simply playing a double stroke roll. My MEAN double stroke roll speaks for itself... After playing something epic to grab people's attention, step away to "do something" for 30 seconds to a minute. Maybe you'll decide to get water, or take a leak, but even if you have nothing to do, use the short time you have to get yourself in the zone while the audience anxiously awaits to see what's next...
Now of course... there will be a special kind of performance that belting something before the set would be inappropriate in, like when you're drumming as part of a performance that already has hype and suspense brewing before it due to other factors. In that case don't even worry grabbing people's attention. Just splash some cold water in your face and be ready to rock.
The point of practicing is so that we can play every note with conviction without working ourselves out of the zone of comfort.
Record your performances. There may be some great moments/ideas you can share, but more importantly it will give you a chance to listen to yourself and be honest about what you need to work on. Being honest about what feels right and wrong is more important than all the time we put into practicing. It's amazing how many drummers don't practice self-awareness. They get good at playing certain things but then are out of place in the context of musical scenarios. It helps to have well-meaning people tell you what they honestly think. Reach out to them. I'm always here.
Be ready to practice patience. Sometimes a lot of us want to just play stuff we know out of muscle memory and move our hands and feet out of excitement, so we play when it would serve the musical situation better to just wait until the right time to play. A lot of us are guilty of this to an extent. When it's your time to shine, do your part confidently with your own style. If you over play when it isn't that time, then it will make what you have to say less impactful when it really counts. Relax. Those moments to shine are worth waiting for.
If you skipped over it, go back, and refer to the end of the chapter on "proper set up". Set up and break down gear quickly.
If you are going to go against what I say...
That's cool. If you are confiding in getting information out of me...
I will just share it and have faith that it will be helpful. I also take note of some legends that have completely different approaches than mine that I don't see eye to eye with, but that I still appreciate and respect their messages. Whatever it takes to get your message across in a genuine way is great. I am always finding exceptions to rules myself. You will see me break rules, I'm sure. It may be due to some unique circumstance, or because I surrender to the music in a way where I throw technique out the window. I usually will pay the price afterwards in a physical way where I'm sore. It's usually worth it. The pains do keep adding up though, and I'm just trying to do my best to be able to play drums for as long as I can which means becoming better about taking care of the body. That is why I'm always open to learning how to optimize in achieving this and now trying to share that with you. Experience helps. The more that better technique becomes ingrained in you, the more you can afford to forget about it.
I will not take it personally if you disagree with me.
The grid
Know your way around.
COMING SOON
Tuning
Trust your ears, but also know what's up!
COMING SOON
Pick the right texture
Read the room. Look at the rest of the ingredients. What else is involved?
COMING SOON
Splitting rudiments amongst limbs
You will use vocabulary from the last article, but now from the perspective of using rudiments
COMING SOON
Writing/Learning drum parts
Thoughts on contributing to music in different situations.
COMING SOON
Using cheeses to broaden your sound on the kit
They're easy to use on one surface, but it takes a more adventurous approach to apply them to the kit!
COMING SOON
Create Your Own Website With Webador